創楽【車カスタム】
Weber carb DCOE overhaul
①First・Venturi effect


Weber DCOE overhaul
Category
| ①First・Venturi effect | ②Float・needle | ③Idling process |
| ④Pump・main process | ⑤Starter process | ⑥Summary |
創楽【車カスタム】ウェーバーキャブDCOE
カテゴリー
| セッティング | オーバーホール | 外車のセッティング数値 |
| 国産車のセッティング数値 | サニー 取付け例 | ハーレー 取り付け例 |
| ミツバ フェーエルポンプ | S20 ソレックスデータ | |
| ウェーバーDCOEホーム | 創楽・車カスタムホーム | 創楽・ホーム |
At the beginning of an overhaul.
The price of Weber carburetor also rises recently.
A poor person like me can't buy a new article.
But secondhand,even if I get it,it isn't possible to use.
So it's overhauled.
About the contents introduced here. Most is my original.
Overhaul in self-responsibility, please.
In case of an overhaul, please exchange consumables
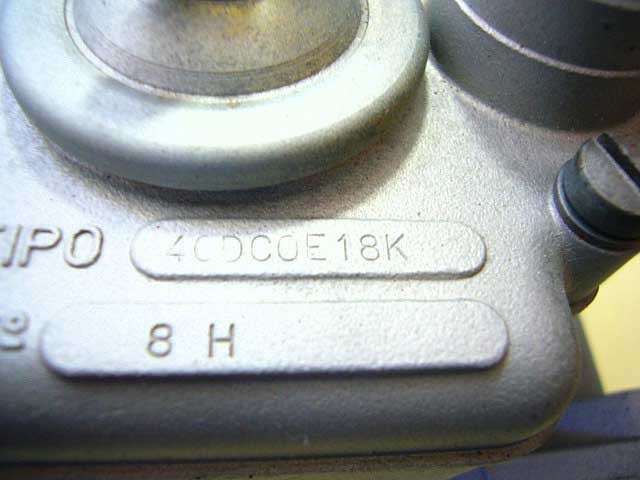
About this overhaul.
Weber 40DCOE18K No. 8H is used.
First of all, there are parts to check
before starting overhaul.
It is that the carburetor is looked in from the f
ront side, and both of the butter valves in the
back are completely closed.
When it is not closed · A gap is created above
and below the butter valve and the light leaks.
If there is only one gap, there is a possibility
that the throttle shaft is distorted and it is a large o
verhaul.
There is no distortion in the throttle shaft here
Overhaul the state carburetor. In the case of
purchasing second hand at auction etc., I think
that it was better to bid successfully after checking
this part.
If this part is distorted, it can not be adjusted
with the cab balancer, there is a case that the
rotation does not fall and the idling does not do.
It is a very important part.
Conversely, if both of the butterfly valves
close cleanly, it will be possible to use somehow
with overhaul!
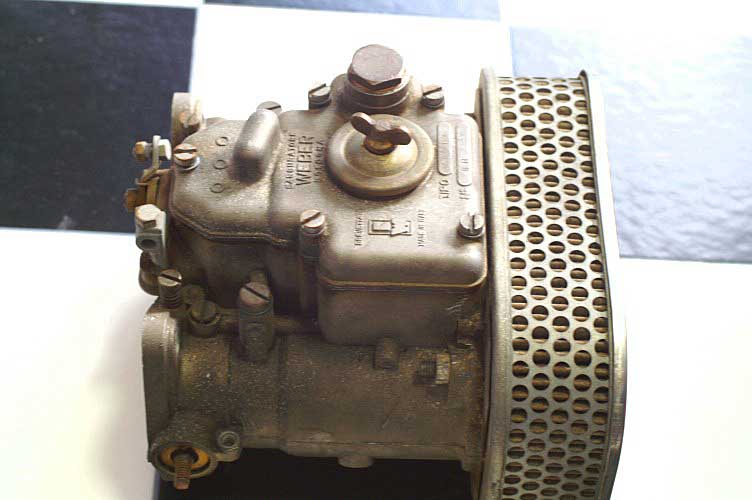
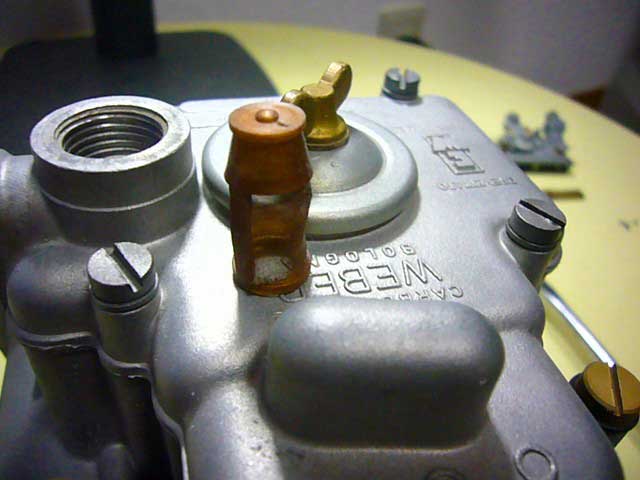
Carburetor condition
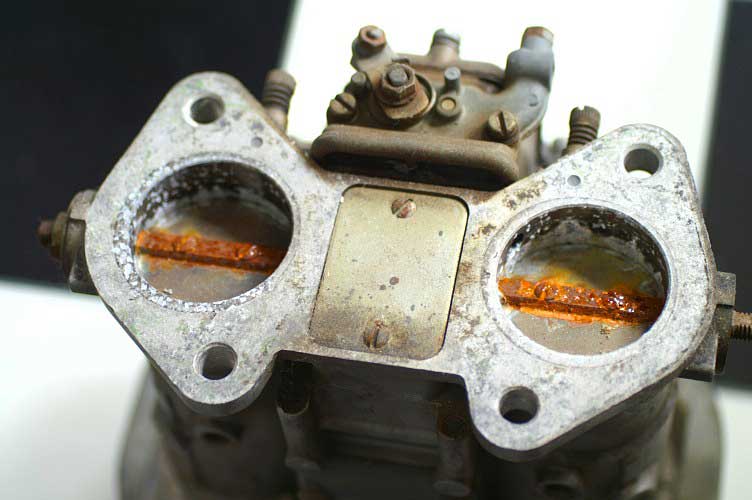
This carburetor is very severely damaged,
it goes into overhaul after sandblasting.
Although sandblasting was hung on
a friend, there are notes.
Details will be introduced
on the last page.
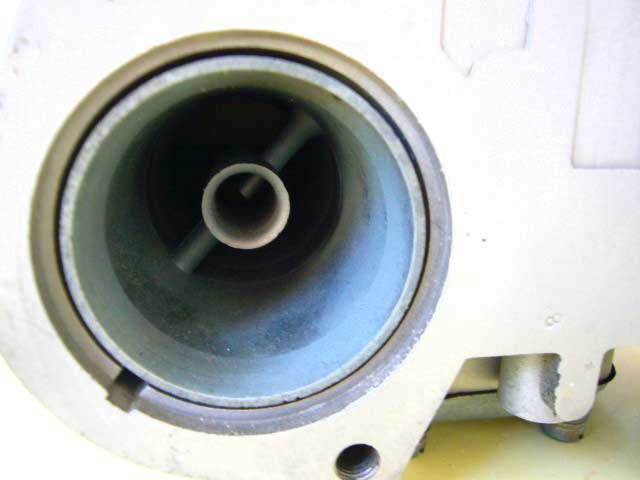
Confirmation of Venturi effect
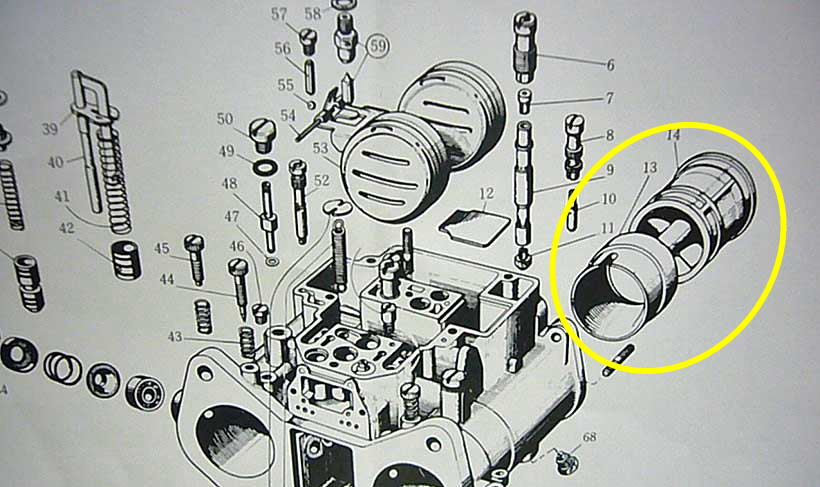
The diameter of the carburetor is 40 φ, but
by raising the flow velocity towards the ex
haust volume of each cylinder of the engine
to be mounted and the purpose,
Reduce the aperture.
That part is the outer venturi No. 13, and the
venturi with the main nozzle is No. 14 ·
inner venturi.
For venturi size,
This way
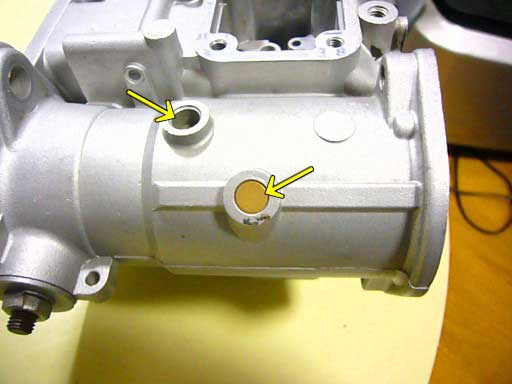
In this old Weber carburetor, the Venturi
is plugged into the cab body, but the 45
pie and the new carb contains the lock
bolt that fixes the venturi in the arrow part.
There is probably a lock on the
nut so that the nut will not slack.
Spread it with a screwdriver
and remove the nut
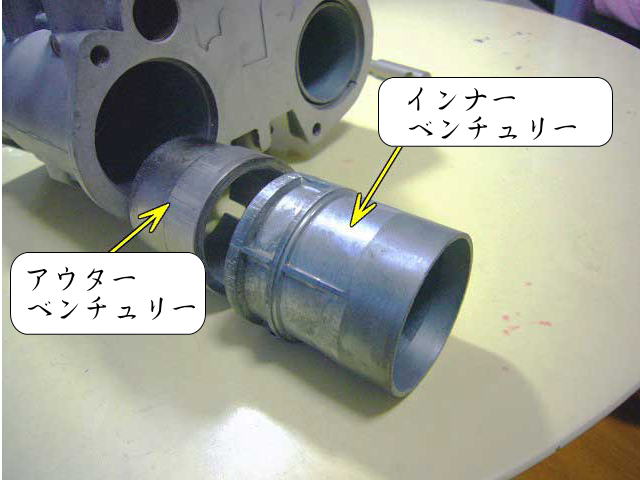
Remove the inner venturi from the front
of the carburetor body, then take out the outer
venturi.
If it is unlikely to break off, attach a
lubricating spray to the contact surface.
Although it can not be seen in the photograph,
the convex part of Venturi is contained in the concave
part of the cab body, so the Venturi will not rotate.
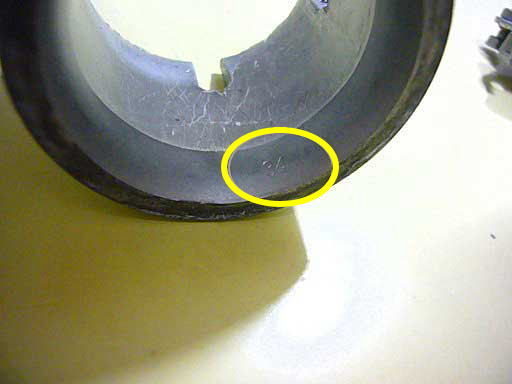
Check the size of each venturi.
The outer venturi is displayed on the
front part of the venturi.Size for each displacement
This way
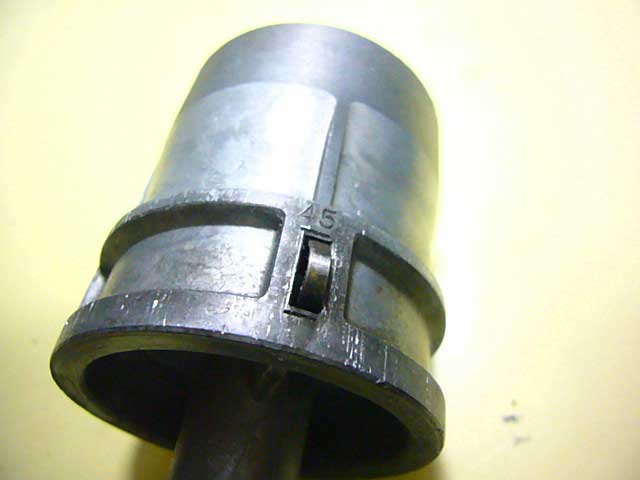
The size display of the inner
venturi is near the venturi convex portion.
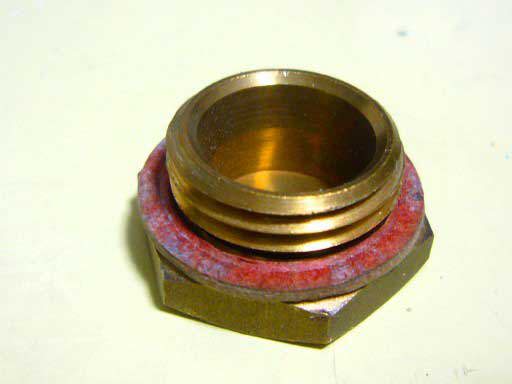
Confirmation of needle float
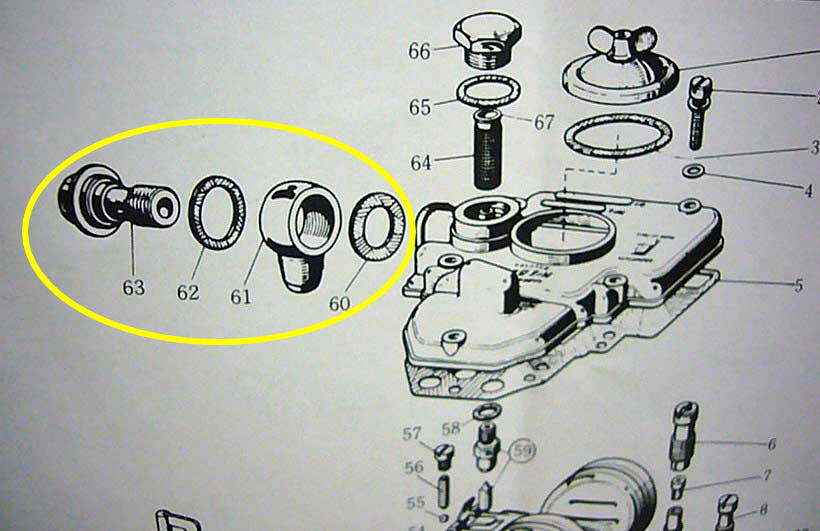
For disassembly this time, the fail
hose mounting part enclosed with
○ in the figure starts from the place
which was removed beforehand.
The copper packing of No. 60 and No. 62
surrounded by this circle is a place to pay
attention enough because there is a possibility
that fuel will leak from there if the tightening
of 63 bolts is weak.
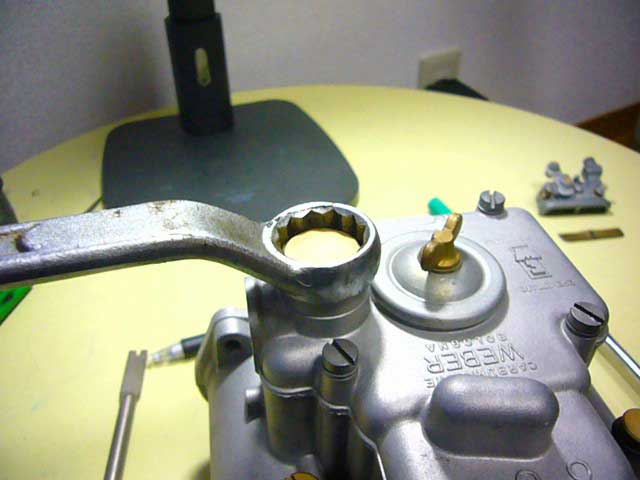
First remove the upper bolt
with a 19 mm wrench.
When the bolt is removed, the filter is inside.
(Filter No. 64 from the figure)
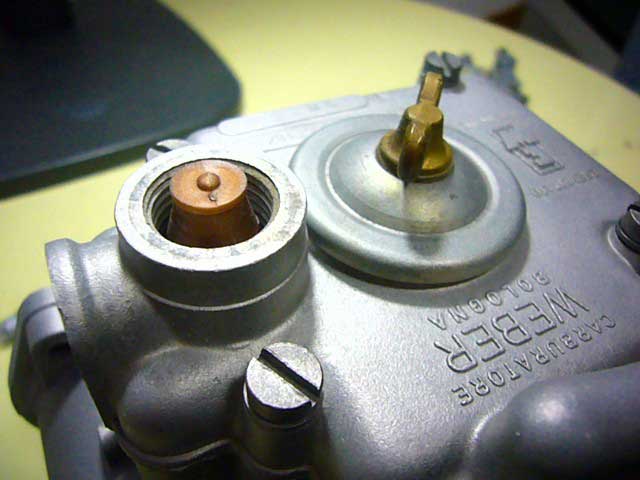
It is a picture taken out a filter.
When dust or the like is attached to this filter
If there is a cause in the fail line / pump etc.
It is conceivable.
Normally it is beautiful.
Packing is attached to the removed bolt.
When installing, we recommend a new one.
From the figure, 65th volt
| ②Float・needle |
Weber DCOE overhaul
Category
| ①First・Venturi effect | ②Float・needle | ③Idling process |
| ④Pump・main process | ⑤Starter process | ⑥Summary |
創楽【車カスタム】ウェーバーキャブDCOE
カテゴリー
| セッティング | オーバーホール | 外車のセッティング数値 |
| 国産車のセッティング数値 | サニー 取付け例 | ハーレー 取り付け例 |
| ミツバ フェーエルポンプ | S20 ソレックスデータ | |
| ウェーバーDCOEホーム | 創楽・車カスタムホーム | 創楽・ホーム |
55