創楽【車カスタム】
Weber carb DCOE overhaul
②Float・needle

Weber DCOE overhaul
Category
| ①First・Venturi effect | ②Float・needle | ③Idling process |
| ④Pump・main process | ⑤Starter process | ⑥Summary |
創楽【車カスタム】ウェーバーキャブDCOE
カテゴリー
| セッティング | オーバーホール | 外車のセッティング数値 |
| 国産車のセッティング数値 | サニー 取付け例 | ハーレー 取り付け例 |
| ミツバ フェーエルポンプ | S20 ソレックスデータ | |
| ウェーバーDCOEホーム | 創楽・車カスタムホーム | 創楽・ホーム |
overhaul
float
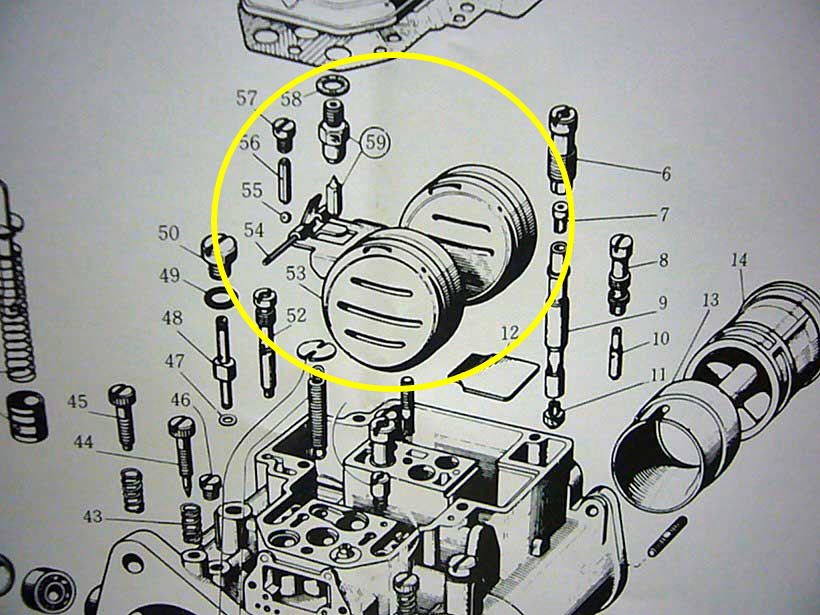
From the previous page,
When confirmation of the fail filter is
finished it is confirmation of the carburetor
upper float diagram No. 53 needle · figure 59.
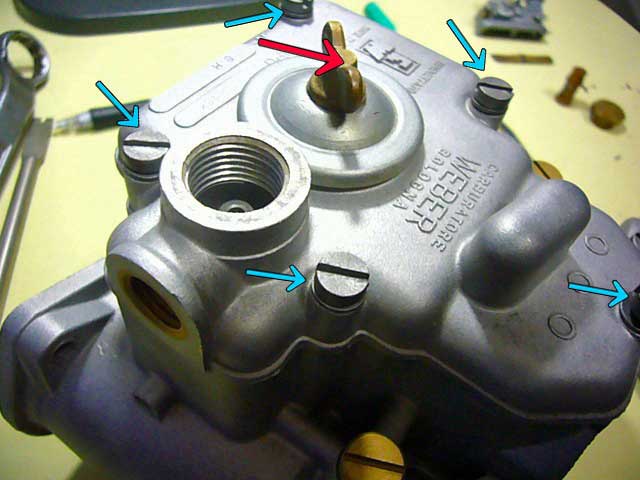
Then, remove the top of the Weber
carburetor. First remove the photo (red arrow)
jet cover and with a flat head screwdriver
(blue arrow) remove 5 bolts. I think
that it is good to remove it on the diagonal.
Even if the bolt is loosened, when the
carburetor cover does not come off, when
light shock is applied such as plastic hammer
It may get out.
Putting in too much power is not permitted.

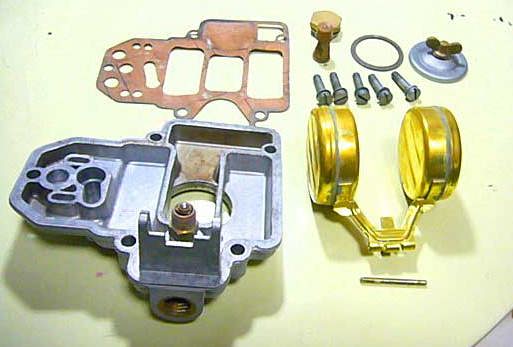
Remove 5 bolts, remove the carburetor cover
I will take it out. Please do not give a
shock to the float of the picture (yellow arrow).
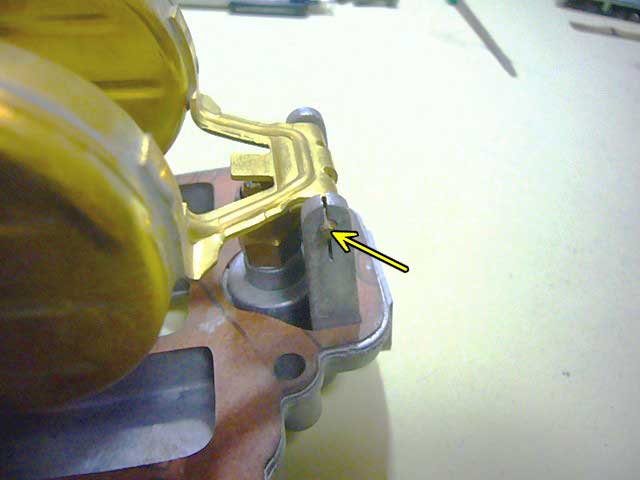
Float and cover connected Figure № 54
Perform from the process of removing
the float pin (yellow arrow).

To remove the pin, with a thin flathead screwdriver,
As shown in the photo, put it in the cover slit a little wider.
Attention, since this part is a very weak part,
If you put too much strength it will
crack. Please do not panic carefully.
Even if it does not spread
out, the pin may come off.
Because it is a severe part, please
perform it only when there is no coming off
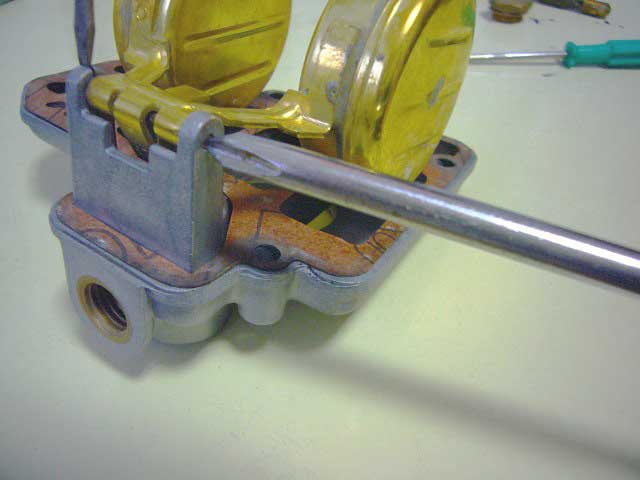
As it is, extrude with a Phillips screwdriver
etc. from the opposite side as shown in the picture.
Lubricating oil etc. If you make it easy to slide,
the work will be easy.

When the pin comes out to the
extent that it can be pulled out with pliers,
Pull out slowly with pliers.
Hold the float (yellow arrow)
Do not stress on parts of
Pull out the pin carefully
(Yellow arrow) part is
It is an important part to
determine the float position.
You can now remove the float.
overhaul
needle
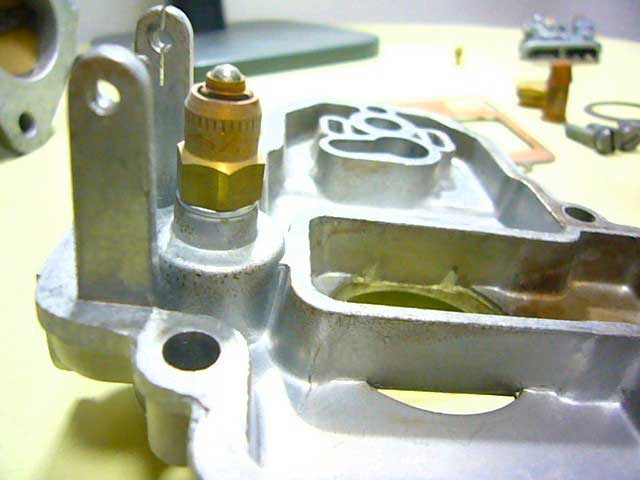
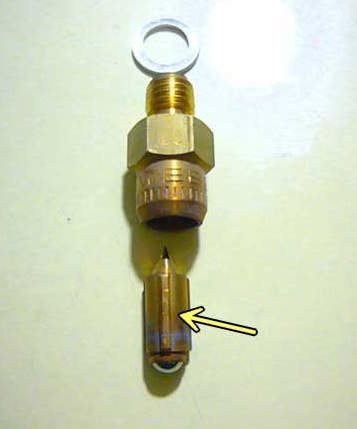
Remove float and gasket,
It is in a state with only a
needle valve attached.
Remove the needle valve from now.
Needle valve is 10 mm
It can be removed with a wrench.
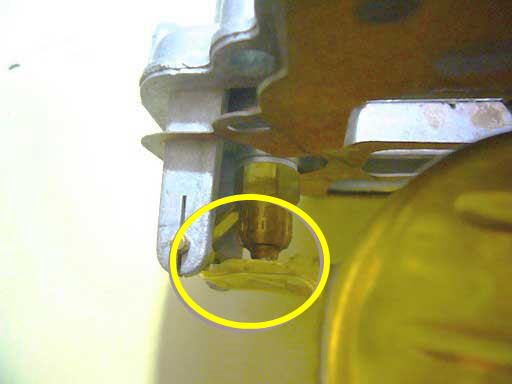
Briefly explaining the needle valve,
Fuel enters the float room and the float lifts
This (yellow arrow) part is lifted
Stop fuel supply.
During traveling, the float will s
ink for the amount of fuel decrease
The needle opens and fuel is supplied.
During driving, the height of t
he fuel in the float room
It is important to keep constant
At this time, the size of the needle valve becomes
Make sure it is suitable for the installation engine.
Check the size
This way
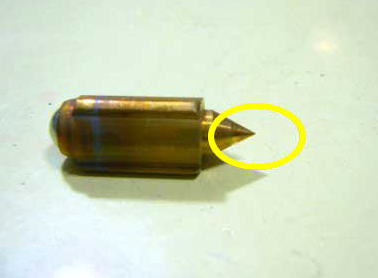
A contact for stopping the supply of the needle valve,
Confirm whether there is a reduction stepped.
After finishing checking the
size and wear of the needle valve,
Reassemble.
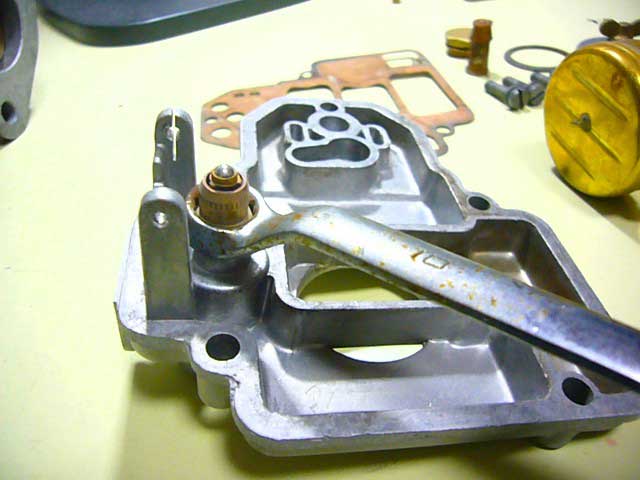
When installing the float, put a new gasket
Please install from. Please check the
mounting direction of the float
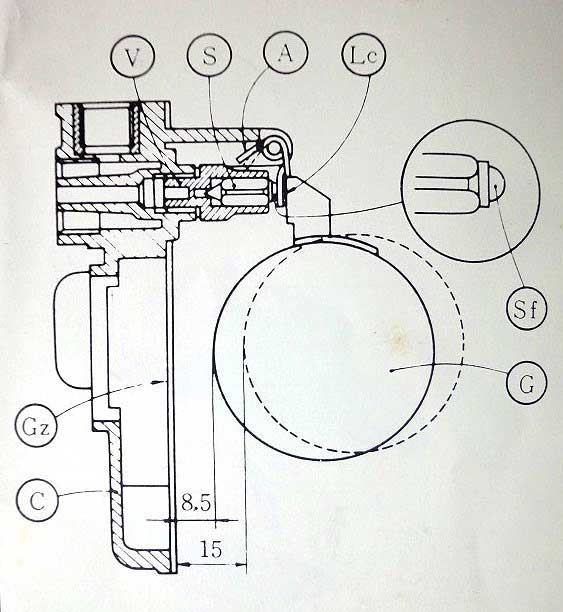
Confirm float position
As shown in the figure, the float rises and the needle valve
The closed height is 8.5 mm · the sunken height is 15 mm
It is in the commentary.
Although this height is also introduced to
Weber carburetor standard setting, the height
may be different for each vehicle.
Because this adjustment is difficult
It was confirmed only.
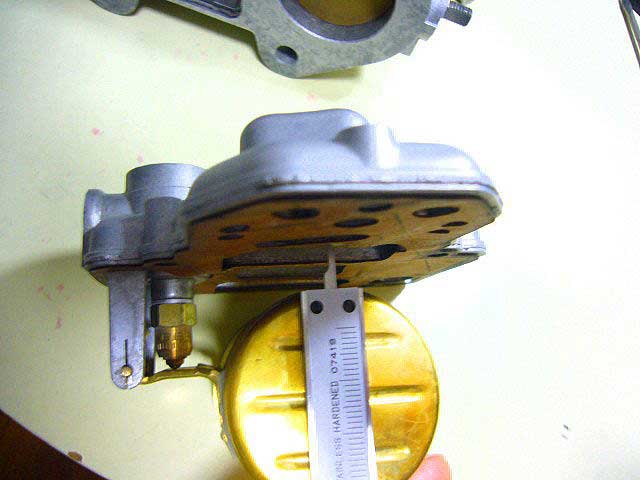
It looks like you are checking the
height of the float with a vernier caliper.
When this is done, the upper
part of the carburetor is finished.
Next we will enter the main body.
| ③Idling process |
Weber DCOE overhaul
Category
| ①①First・Venturi effect | ②Float・needle | ③Idling process |
| ④Pump・main process | ⑤Starter process | ⑥Summary |
創楽【車カスタム】ウェーバーキャブDCOE
カテゴリー
| セッティング | オーバーホール | 外車のセッティング数値 |
| 国産車のセッティング数値 | サニー 取付け例 | ハーレー 取り付け例 |
| ミツバ フェーエルポンプ | S20 ソレックスデータ | |
| ウェーバーDCOEホーム | 創楽・車カスタムホーム | 創楽・ホーム |
55